Dentrix Enterprise and Jarvis: A Report Guide
Introduction
The following sections highlight how the modules in Jarvis Analytics populate their data. You’ll discover how to compare data in Dentrix Enterprise reports to the data in Jarvis so you can better understand the numbers you see. This will allow you to feel confident in Jarvis’ ability to structure and give useful insights into the trends and recommendations for your business.
Disclaimer
If your office or organization has customized any core metrics (Gross Production, Net Production, Adjustments, Collections, New Patients, or Patient Visits) please contact your Customer Success Manager for a customized report guide. The below report guide provides instructions based on the platform’s default metric definitions and calculations.
Quick Summary
PMS Report Types
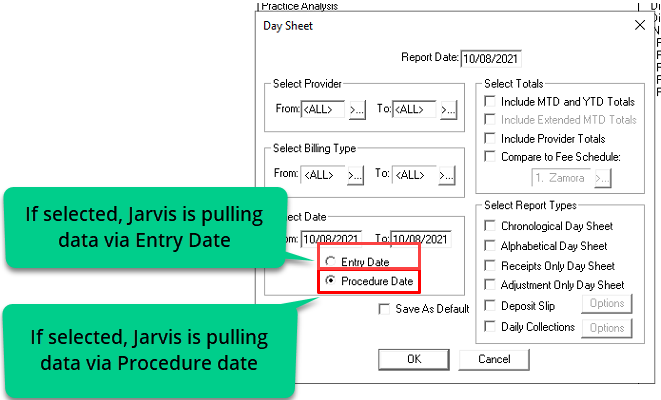
When comparing Dentrix Enterprise reporting to Jarvis Analytics, it is critical that the PMS reporting is generated using the same report settings that Jarvis is configured with to ensure matching values between both platforms. Dentrix Enterprise’s integration to Jarvis Analytics can be configured using two different report settings, Procedure Date or Entry Date (Create Date).
Confirming Jarvis is Connected Correctly:
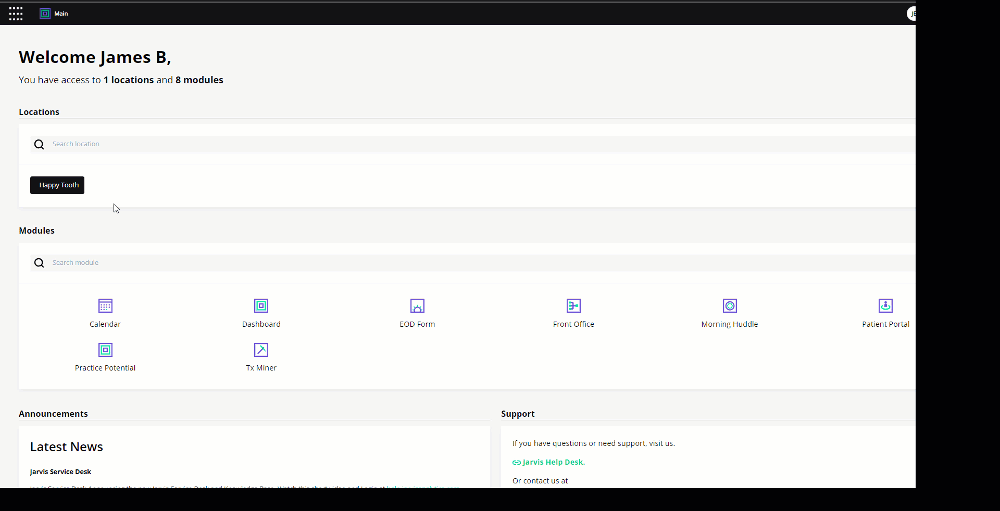
Not sure what setting your Jarvis Analytics platform is based on? Find out by going to the Main page of Jarvis and opening up your location information card.
Confirming Dentrix Enterprise is Connected Correctly:
- Did you use Proc Date or Entry Date
- Open up the Day Sheet (Don’t know how? Look Here)
- See which is selected:
Also, you can check by printing off your Day sheet report.
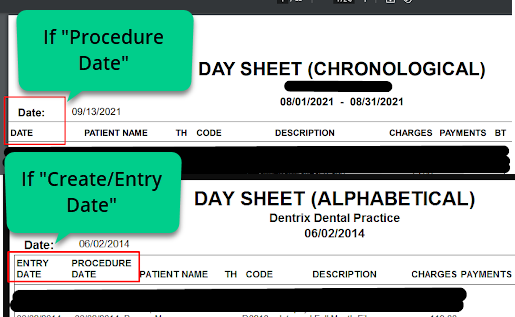
A “Procedure Date” report will only display one date column. An “Entry Date” report will display two date columns. Once you have confirmed what you are using, then you can know that you are connected correctly.
Aging between Jarvis and Dentrix Enterprise
In this section, we will cover:
- How the Aging / Credit Balance report can be generated
- How to find the same data in the Aging Module in Jarvis, and how you can find and compare data between the two programs
- After accessing the Dentrix Enterprise Office Manager, Go to DXONE Reporting -> Ledger -> Aging Report

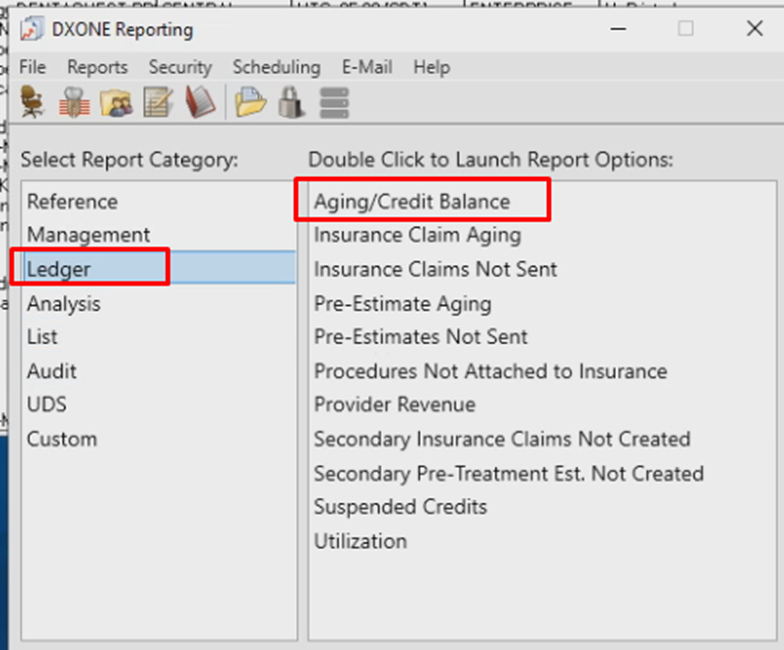
- To Add “Include Credit”: In the Aging/Credit Balance window, update the following 3 parameters in the report:
- Use the dropdown for Balance Range, and change it to all,
- Ensure you have selected the Clinic you want to be included in the report
- Ensure the last 2 Aging intervals are changed from the defaults of 150 and 180 to 180 and 999.
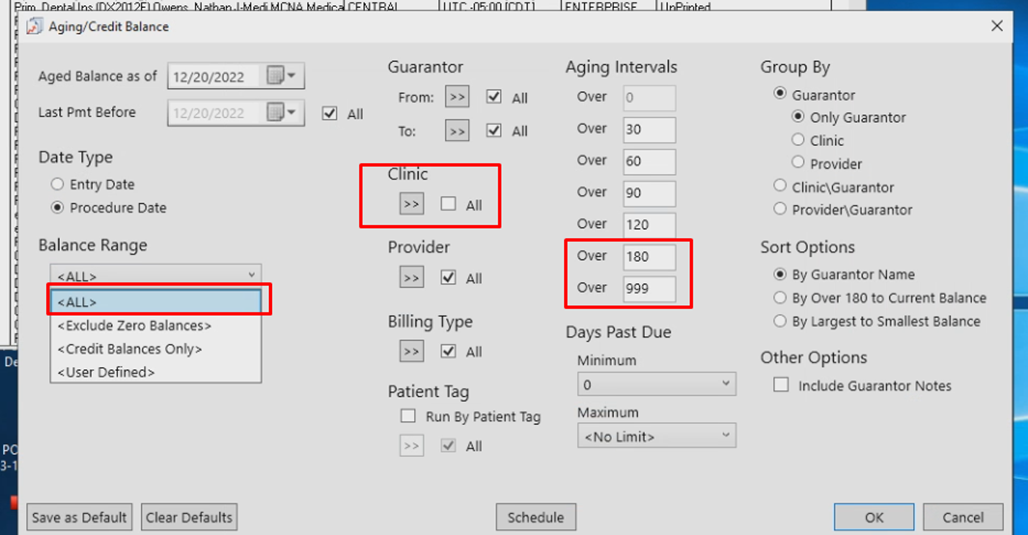
- To Exclude Credits:
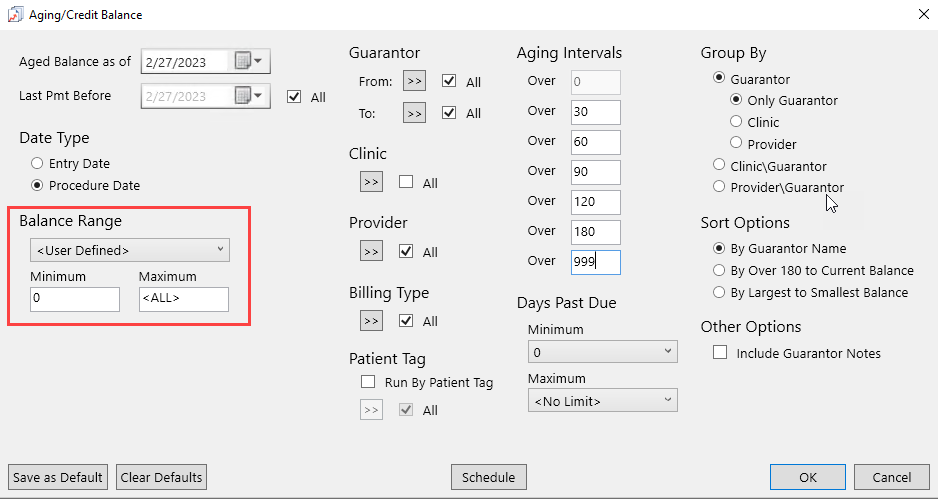
- After clicking ok, the Report Preview will appear. Click the Print button in the top left corner to print the report.
- After clicking ok, the Report Preview will appear. Click the Print button in the top left corner to print the report.
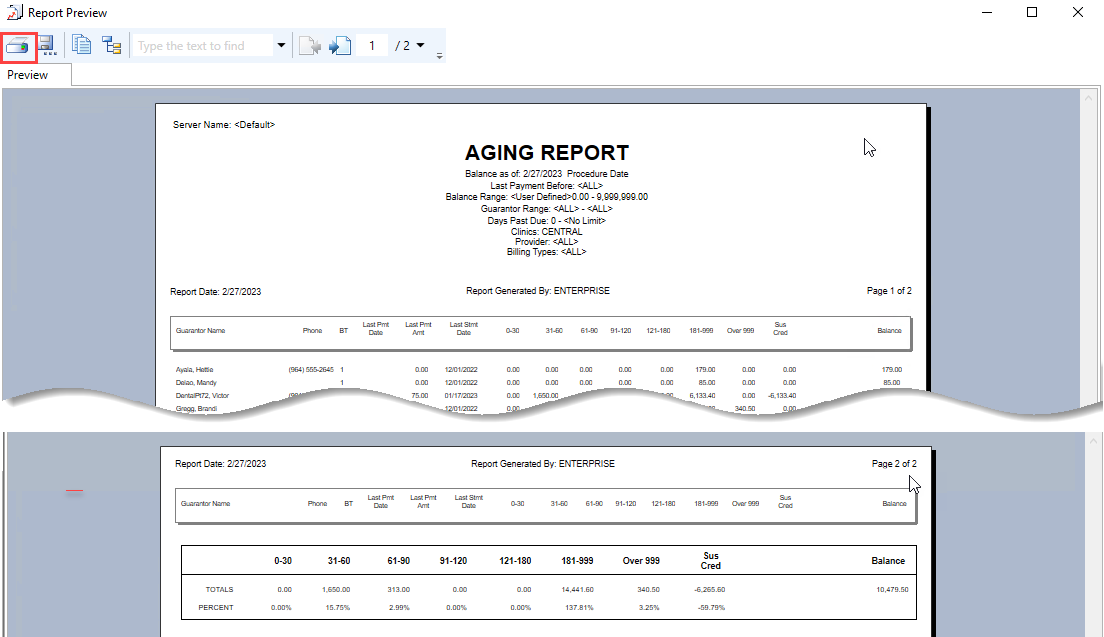
- Reading the Aging Report – Located in Aging Module
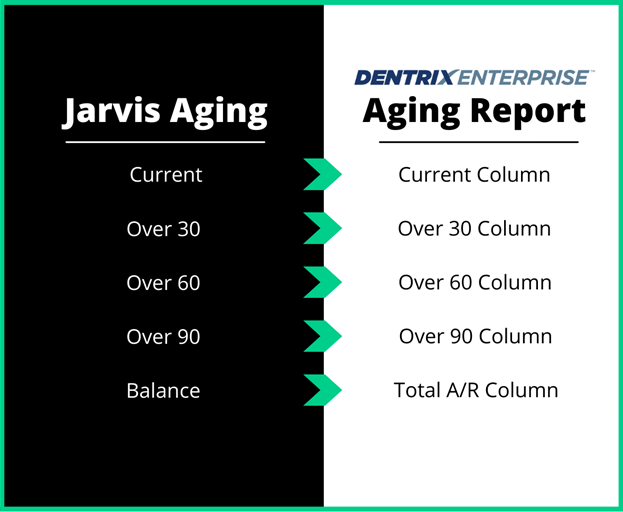
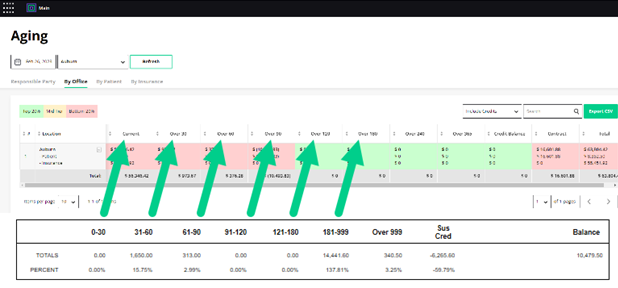
NOTE: The Jarvis Aging report will only display aging data from the day it was installed and going forward. When comparing this to your Dentrix Enterprise Aging report, compare them within the same date range
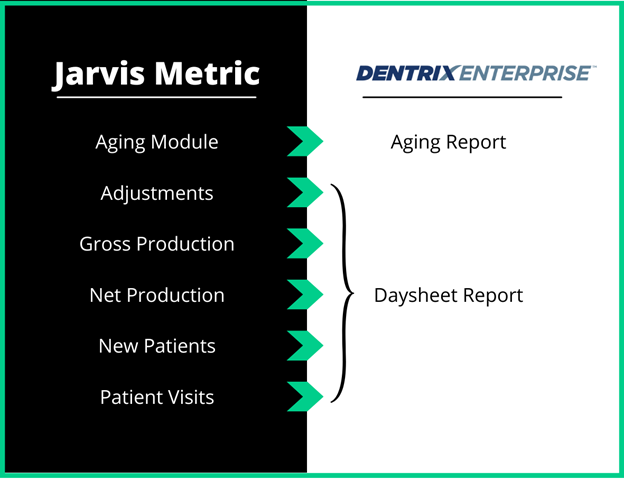
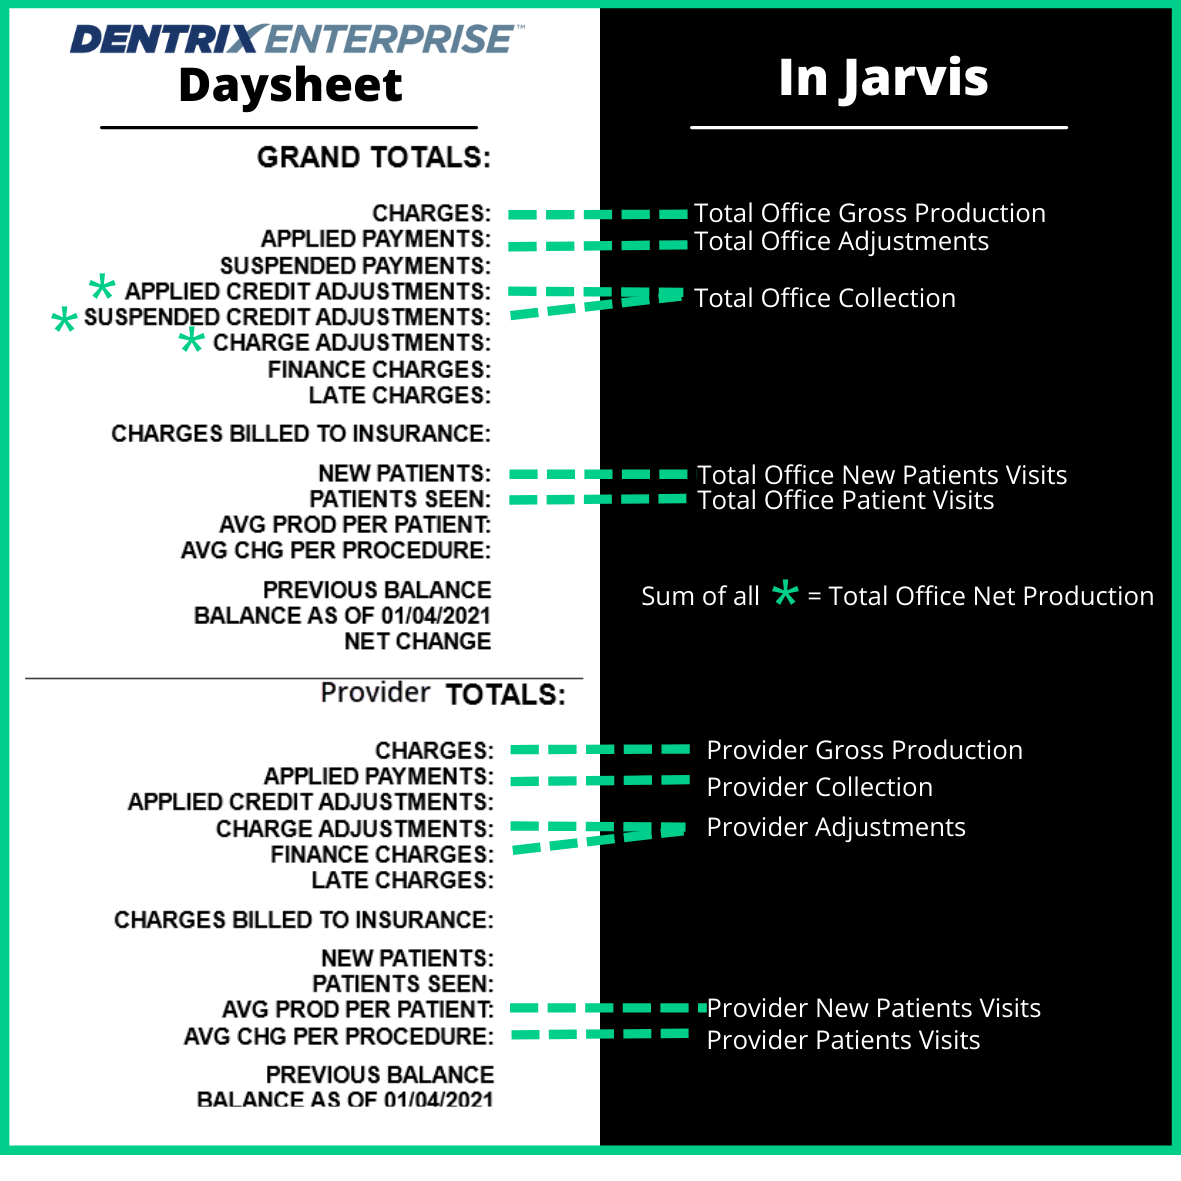
Adjustments, Collections, Production and New Patients.
These metrics are all found on the same report in Dentrix Enterprise known as the Day Sheet report. Below you will learn how to create, and interpret the Day Sheet report. Use the data from the Day Sheet to ensure that Jarvis is correctly pulling your data from Dentrix Enterprise.
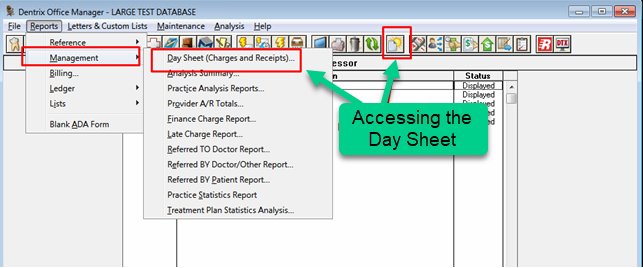
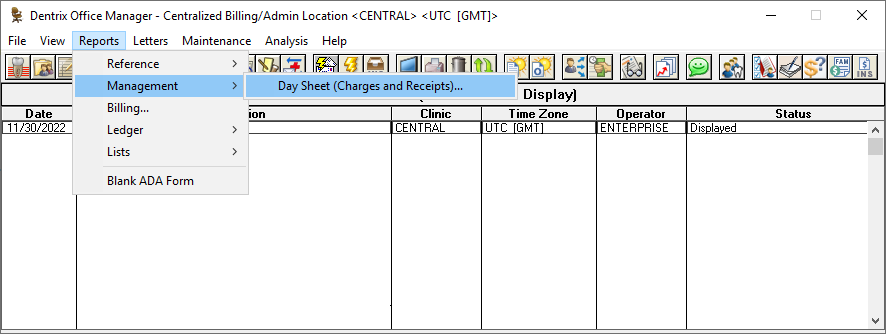
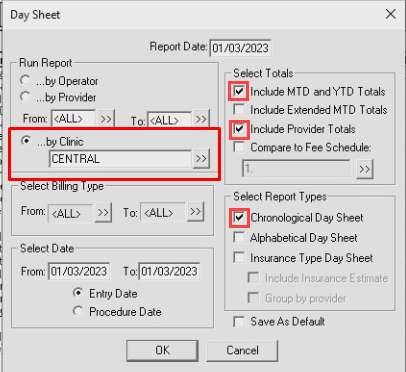
Creating the Day Sheet Report
- Go to Reports-> Management -> Day Sheet (Charges and Receipts) or click the Day Sheet Button from the toolbar
- In the Day Sheet options, enter the date type/report type you use (see PMS Report Types section). Ensure the following options are selected and click OK:
- Run Report -> by Clinic (this is important as there can be multiple offices in one database that you need to select properly)
- Select the Include MTD and YTD totals option
- Select the Include Provider Totals option
- Select the Chronological Day Sheet report type
- Once you have clicked Ok, the batch processor will appear. Double-click the Day Sheet (Chronological) report to preview it.

- Within the preview window, select the Print button to send a copy of the report to the default printer; or choose File > Print Report to open a window with additional print options
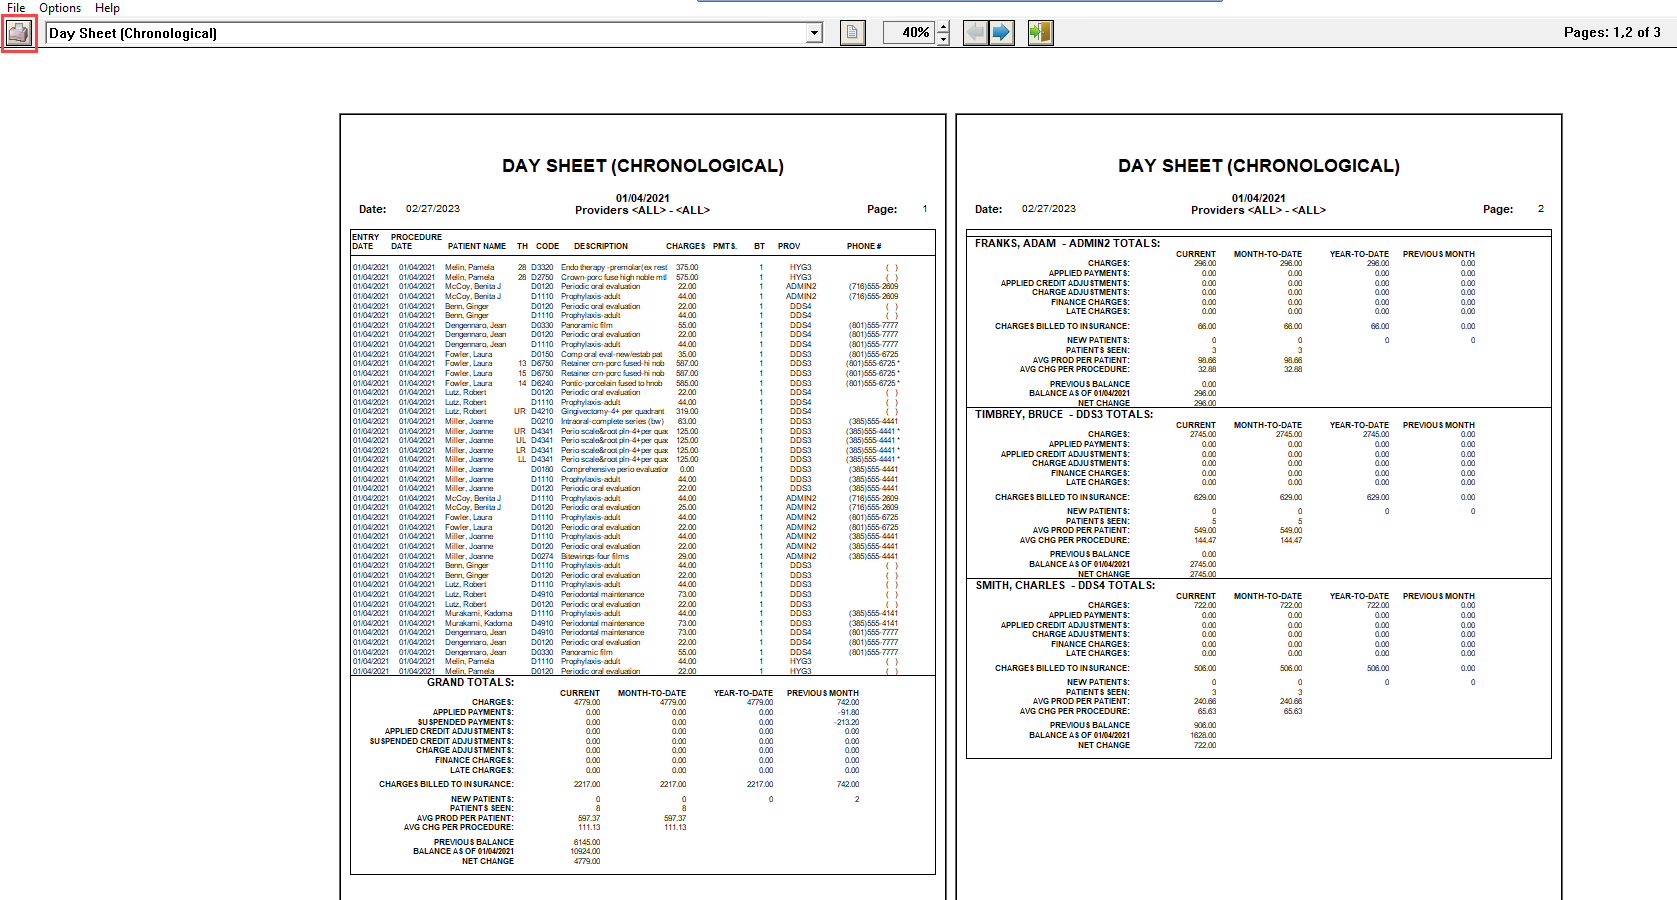
How to Read the Day Sheet Report:
On the Day Sheet report or the report preview, go to the page where the words “GRAND TOTAL” appear, and look at the section with the Office Total and Provider Total.
- Here is the breakdown of the Daysheet:
Important Notes:
- There are some issues with some versions of the Day Sheet where it will not show the new pts and pts properly. If that is the case, please inform Jarvis’ QA team at JarvisSupport@HenryScheinOne.com
