Remote Desktop Installation

This critical step allows Jarvis to remotely connect and assist with Server Connector Installation, allowing your data to be imported into your Jarvis platform.
Installing this application allows the Jarvis team to assist with connecting to the practice server. The installation process should be followed for each location, however, only one installation is required for groups running Dentrix Enterprise or Open Dental which are running on Single database-Multiple Locations setup.
Step 1: Visit the TeamViewer webpage from your browser.
Step 2: Click Download for Free.

Step 3: Save the executable file Teamviewer_Setup.exe to a location of your choice, i.e. desktop.
TIP: Make sure that the browser does not block Pop-up windows or block the download. You may need to Allow Pop-ups temporarily.
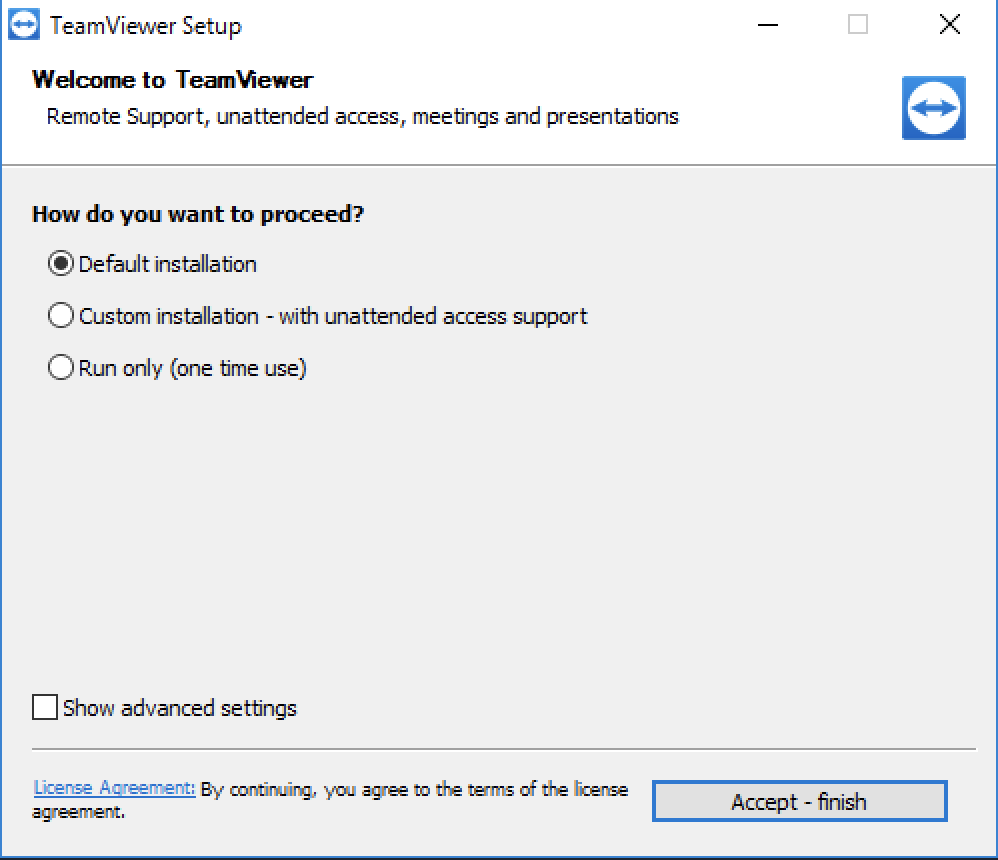
Step 4: Locate and Run the executable file Teamviewer_Setup.exe. A pop-up window will appear.

Step 4: Select “Default Installation” then click “Accept-Finish”. Wait for the setup to finish. This can take up to 3-4 minutes. Once completed, the setup window will close automatically. The application will start automatically. If not, Run the TeamViewer application located in the Start Menu.
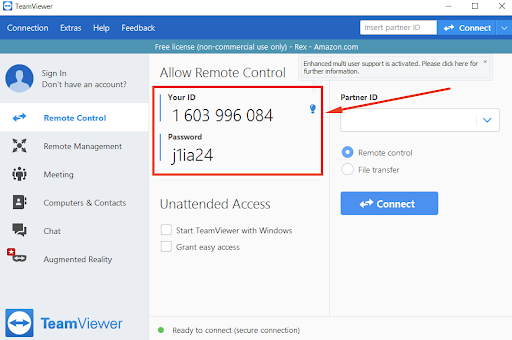
Step 5: Document your ID and the Password numbers (see below)

Step 6: Email Your ID number and Password along with the office name to support@JarvisAnalytics.com
Be sure to add the office name and location affiliated with each ID number and Password.
For any questions related to this process, please email support@JarvisAnalytics.com.
