PBS Endo and Jarvis: A Report Guide
Introduction
The following sections highlight how the modules in Jarvis Analytics populate their data with PBS Endo. You’ll discover how to compare data from PBS Endo reports to data from Jarvis so you can better understand how your data is pulled from your PMS and populated in Jarvis. This will allow you to feel confident in Jarvis’ ability to structure and provide valuable insights into trends and recommendations for your business.
Disclaimer
If your office or organization has customized any core metrics (Gross Production, Net Production, Adjustments, Collections, New Patients, or Patient Visits) please contact your Customer Success Manager for a customized report guide. The report guide provides instructions based on the platform’s default metric definitions and calculations.
Summary
Jarvis Analytics uses 4 reports from PBS Endo to generate its data. The Daysheet (for office totals), Daysheet summary (for provider totals), Patient Accounts Aging, and Provider Journal reports. To use this document, you will need to know on what report the data you are looking at is located. Once you know that, follow the instructions below to create your report, and then compare it to the data in Jarvis Analytics. 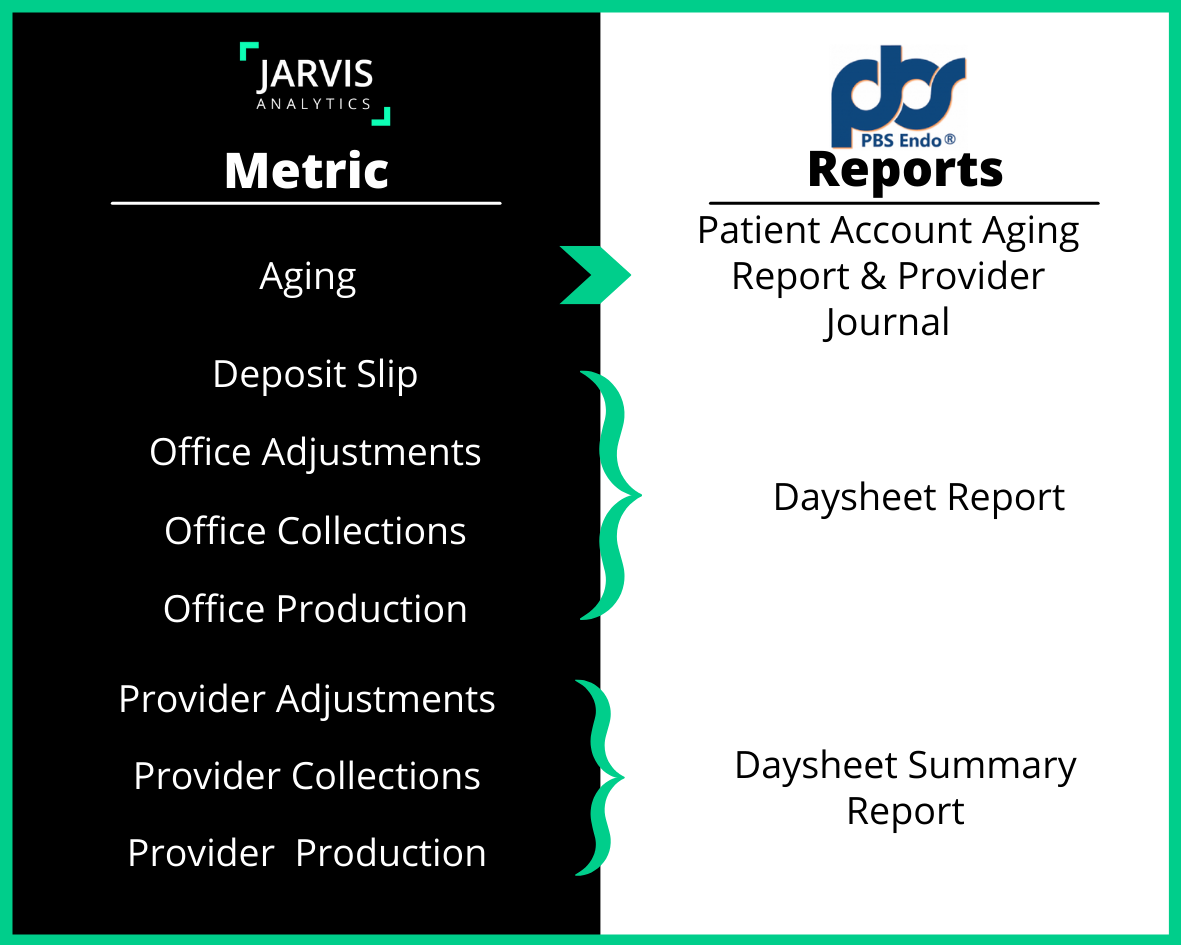
Aging For Current Date Range:
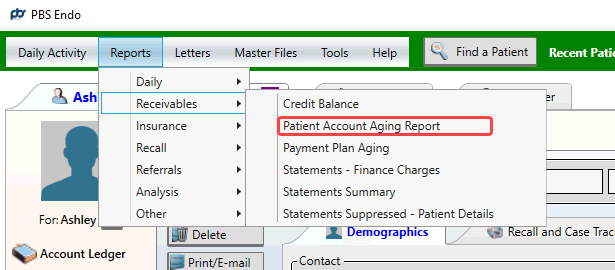
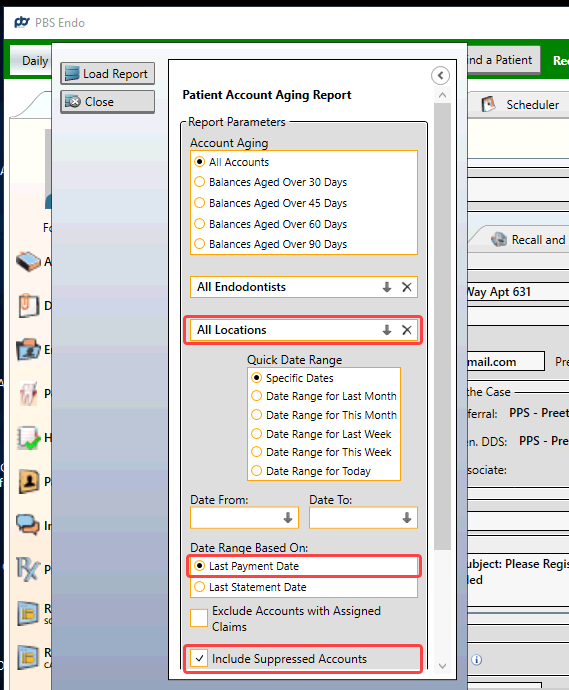
- To create the Aging report in PBS Endo that matches Jarvis’ Aging module, go to Reports > Receivables and select Patient account Aging Report.
- From the window that appears, select the following and then click Load Report:
- Enter your desired Location
- In the Date Range Based on data field select Last Payment Date
- Check Include Suppressed Accounts
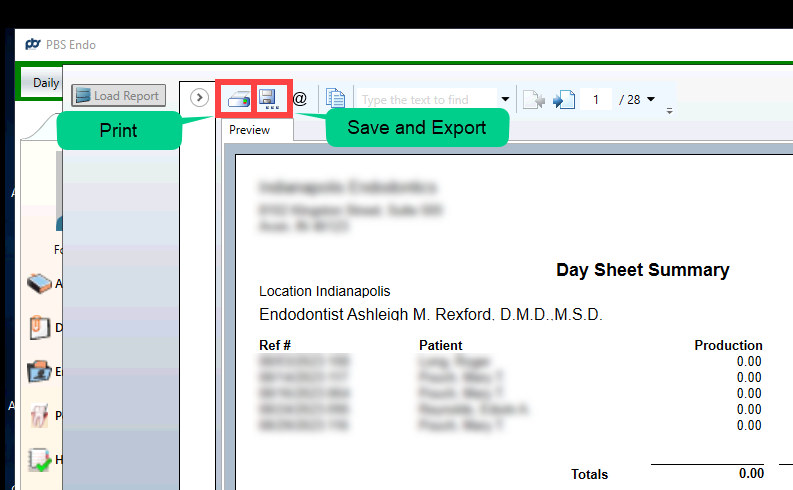
How to print the report
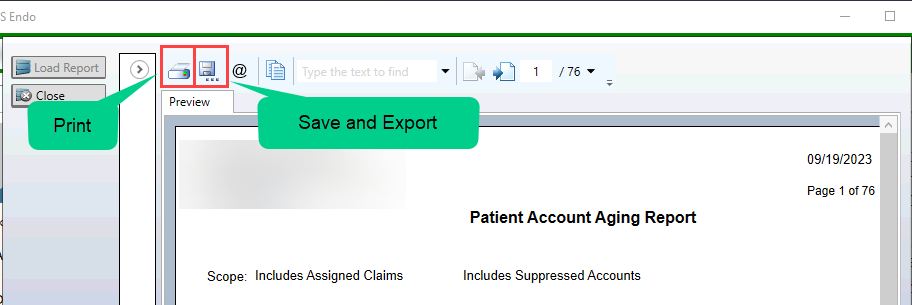
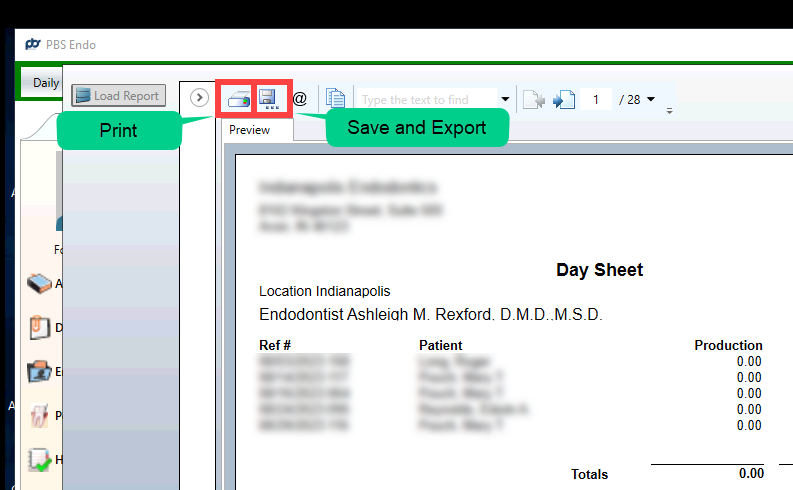
To print or save the report, do one of the following:
- Click the Print Report icon.
- Click the Save icon to export the report as a PDF.
How to read the Aging Report:
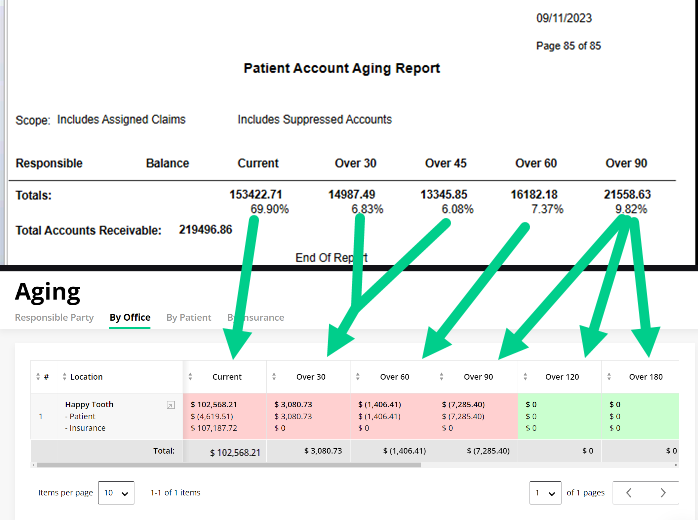
To compare your PBS Endo Aging Report to the Jarvis Aging Module, ensure that your Jarvis Aging Module has every location selected, and you are on the By Office view. 
Aging for Historical Dates (Provider Journal)
- To create the Aging Report in PBS Endo that matches Jarvis’ Aging module, using the Current date range, go to Reports > Analysis > Provider Journal.
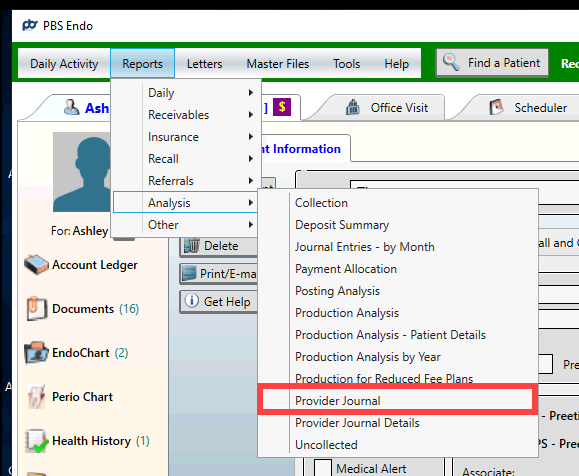
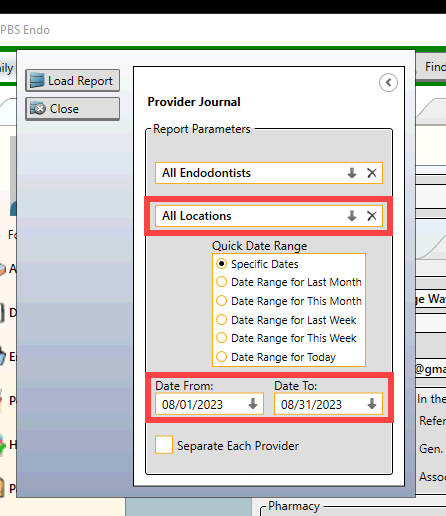
- From the window that appears, select the following and then click Load Report:
- Setup your Location.
- Select your desired Date range.(NOTE: the “Date to” is the date that you want to check the aging for)
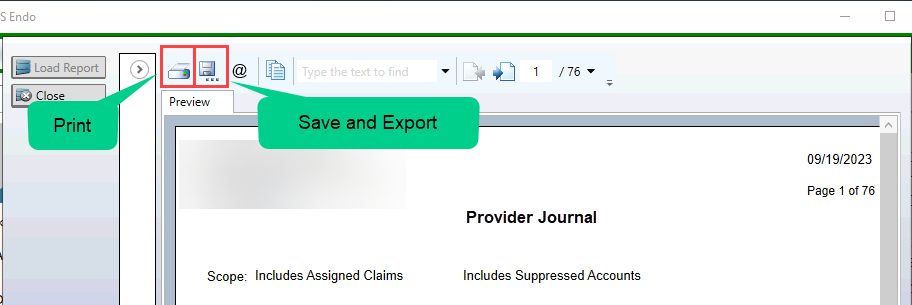
How to print the report
To print the report, do one of the following:
- Click the Print Report icon.
- Click the Save icon to export the report as a PDF.
How to read the report: Aging
To compare your PBS Endo Aging Report for Historical dates to the Jarvis Aging Module, ensure that your Jarvis Aging Module has the exact locations selected and that the By Office view is selected. Then update your Jarvis date range to match that of your PBS Endo Report. The Total Amount should match your PBS Total Accounts Receivable amount.
| Patient Aging Report | Jarvis Aging Module |
|---|---|
| Total Accounts Receivable as of the ending date | By Office > Total Amount for that specific date |
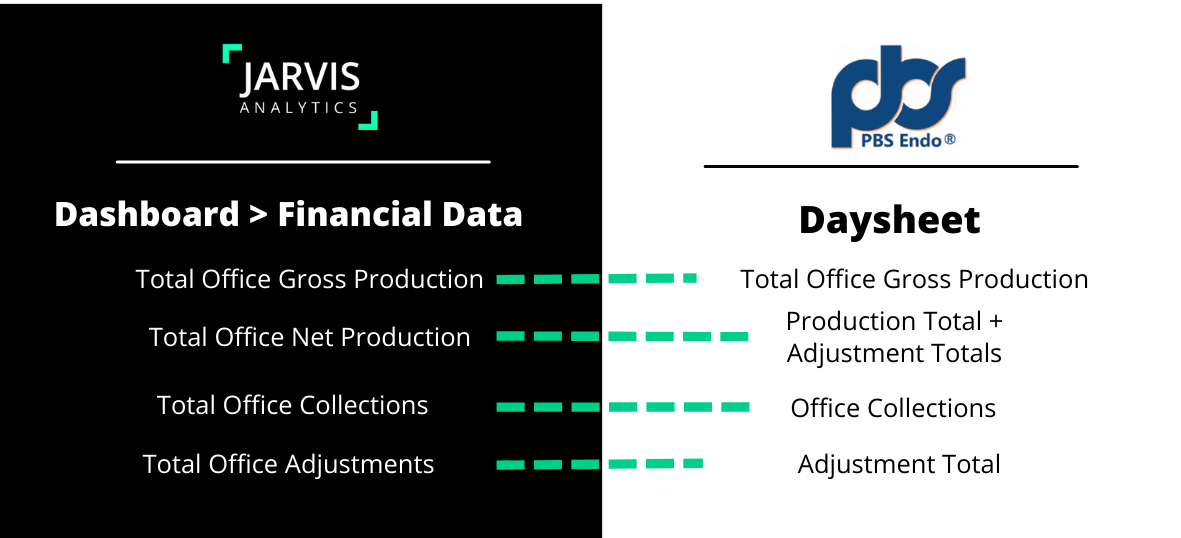
Office: Adjustments, Collections, Gross and Net Production.
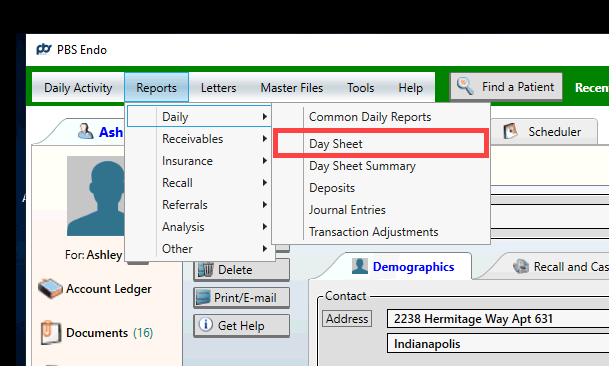
- To create the Daysheet Report in PBS Endo that matches Jarvis’ Dashboard module, go to Reports > Daily Reports > Daysheet (for Office Totals )
- Set the following options then click Load Report:
- Set your desired Location.
- Enter the Date From and Date To range.
- Select which Date Range Based On (the default in Jarvis is Effective Date, but both will work).
- To print the report, do one of the following:
- Click the Print Report icon.
- Click the Save icon to export the report as a PDF.
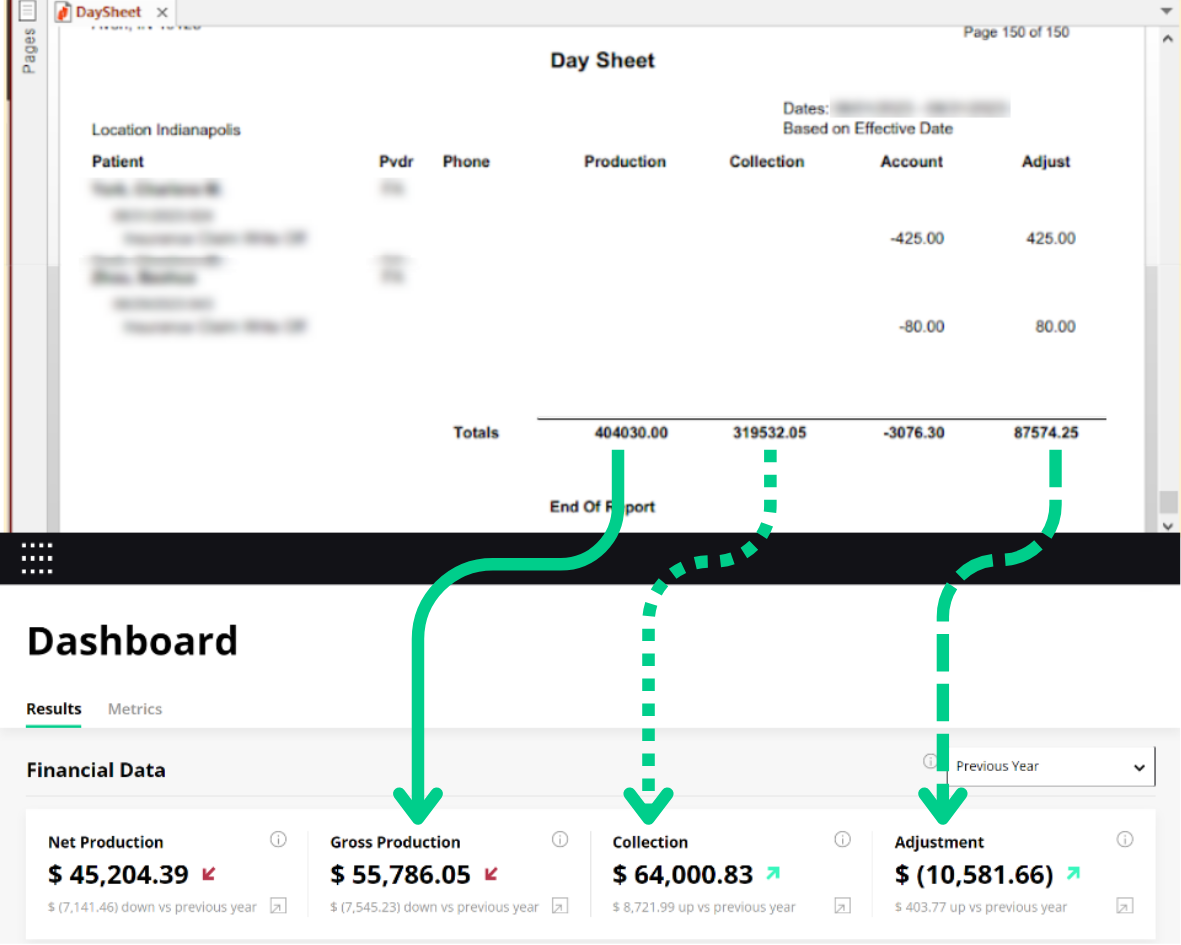
How to Read the Report
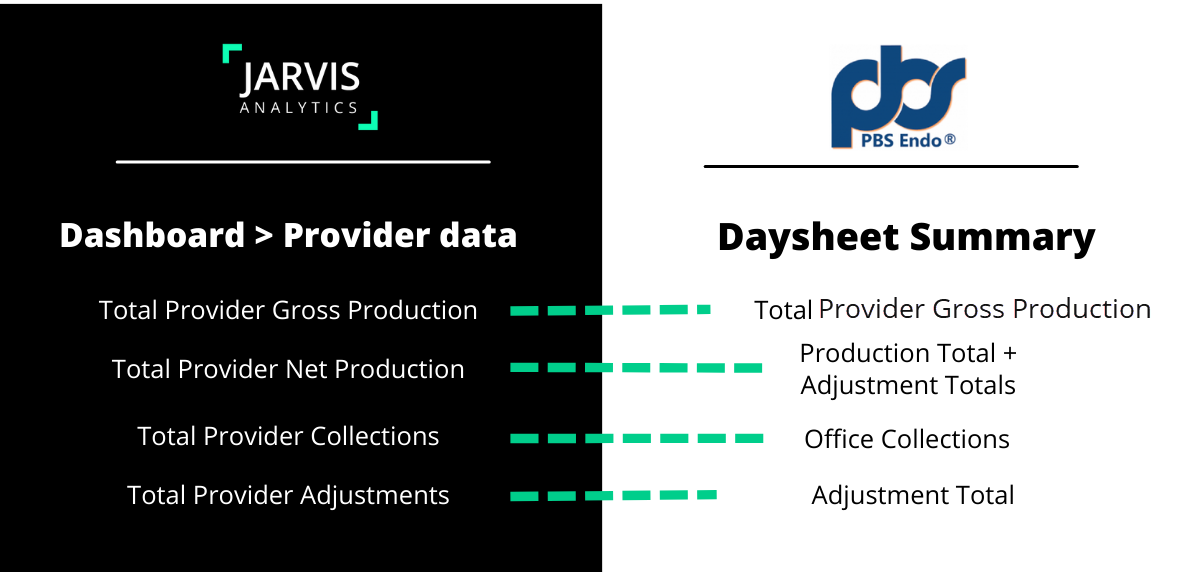
Providers: Adjustments, Collections, Gross and Net Production.
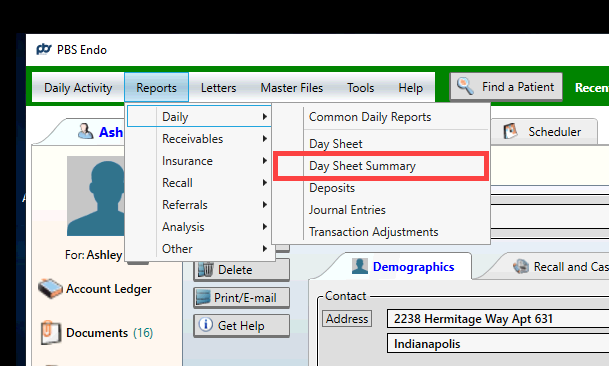
- To create the Daysheet Summary Report in PBS Endo that matches Jarvis’ Dashboard module, go to Reports > Daily Reports > Daysheet Summary (for Provider totals).
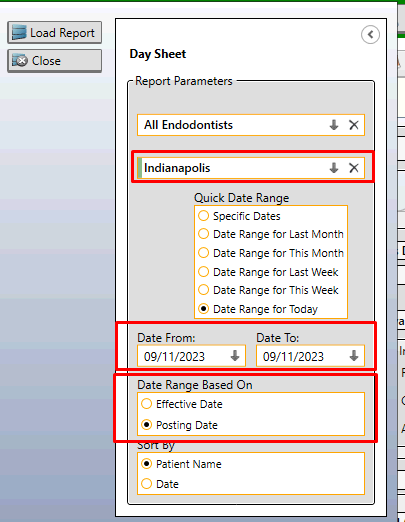
- Set the following options then click Load Report:
- Set your desired Location
- Enter the Date from and Date to
- Select which Date Range Based On (the default in Jarvis is Effective Date but you can choose to use the Posting date)

- After clicking Load Report, a window will appear with your Day Sheet Summary. To print the report, do one of the following:
- Click the Print Report icon.
- Click the Save icon to export the report as a PDF.
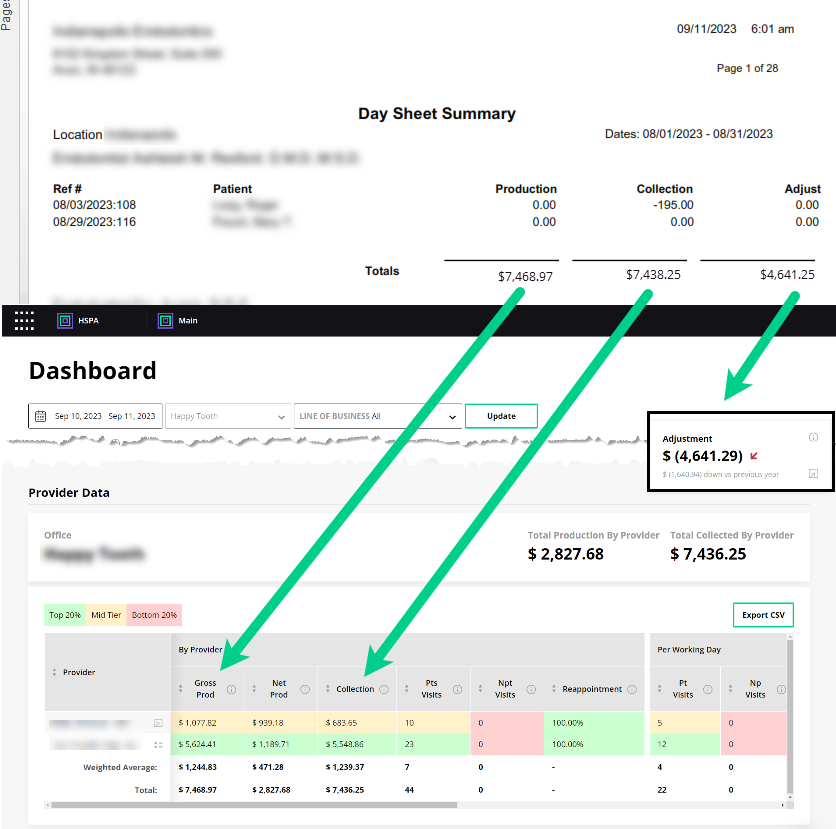
How to Read the Report