Dental Vision and Jarvis: A report guide
Introduction
The following sections highlight how the modules in Jarvis Analytics populate their data. You’ll discover how to compare data from Dental Vision, OMS Vision, Endo Vision, and Perio Vision reports to data from Jarvis so you can better understand how your data is pulled from your PMS and populated in Jarvis. This will allow you to feel confident in Jarvis’ ability to structure and provide valuable insights into trends and recommendations for your business.
Disclaimer
If your office or organization has customized any core metrics (Gross Production, Net Production, Adjustments, Collections, New Patients, or Patient Visits) please contact your Customer Success Manager for a customized report guide. The report guide provides instructions based on the platform’s default metric definitions and calculations.
Summary
Jarvis Analytics uses the Daily Summary, Aging, and Daysheet reports from Dental Vision to populate the data, with each of those reports having a Posted Date and Creation Date option. You will need to know your Report type, and then follow the instructions to create your report with that report type. Then the instructions will show you where to find the corresponding data in Jarvis.

Different Report Types
Data is sent to Jarvis using two types of reports. The two different types create different perspectives on your data. The two report types used to transfer this data are: Posted Date or Entry/Create Date. Ensure you know which report type your instance of Jarvis is using, as you will need it to correctly compare data.
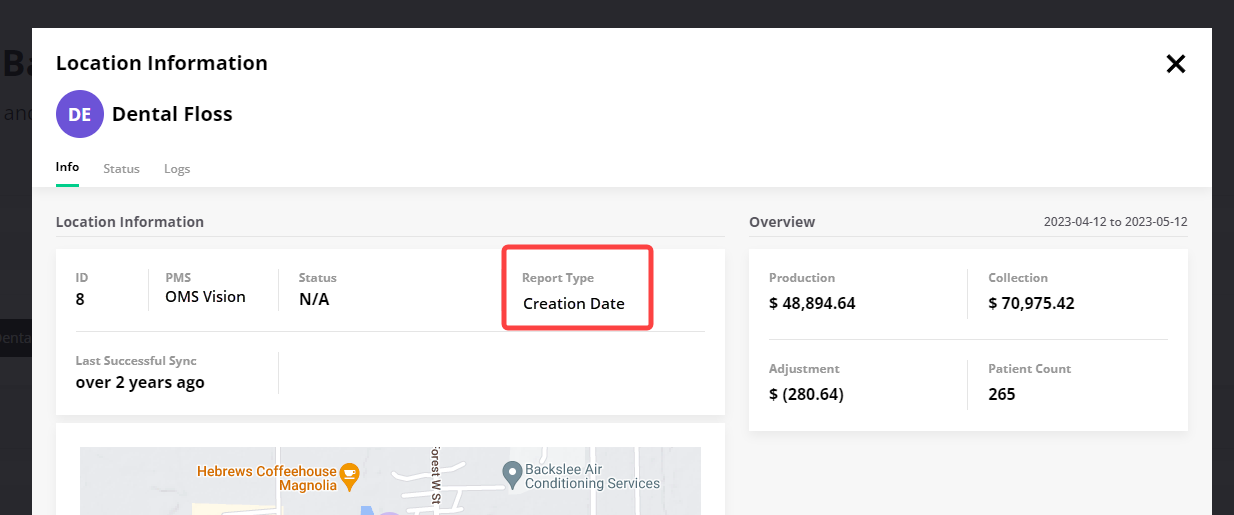
To locate what report type your office uses, go to Main module, and in the upper right-hand corner you will see your location icon. Click on it and your report type will be displayed in the Report Type area.
Aging Report
The Aging report from OMS Vision and the Aging Module in Jarvis are easily comparable. Be sure and pull the Aging reports before the start of the day. Use the following steps:
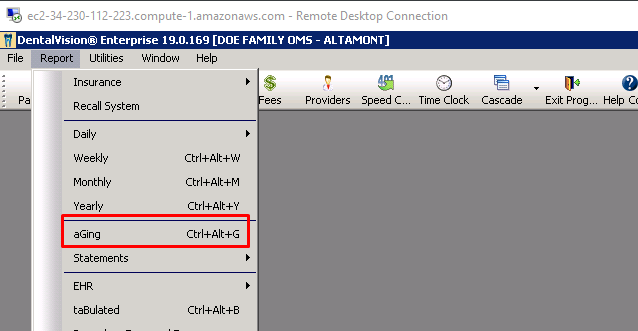
- In OMS Vission, Go to Reports -> aGing ( or Press Ctrl + Alt + G)
To Include Credits
After selecting aGing, the Aging report – Choose Options popup will appear. Uncheck Ignore credits and leave the other settings as they appeared. Click OK. 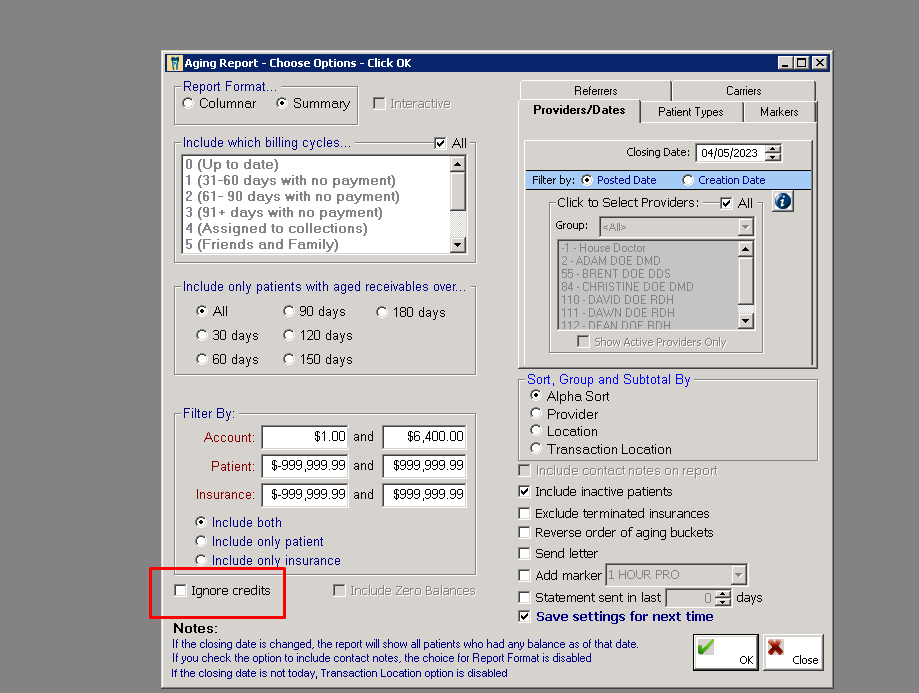
To Exclude Credits
To get the excluded credits, ensure the Ignore Credits box is checked. Leave all the other settings as they appeared and click OK. 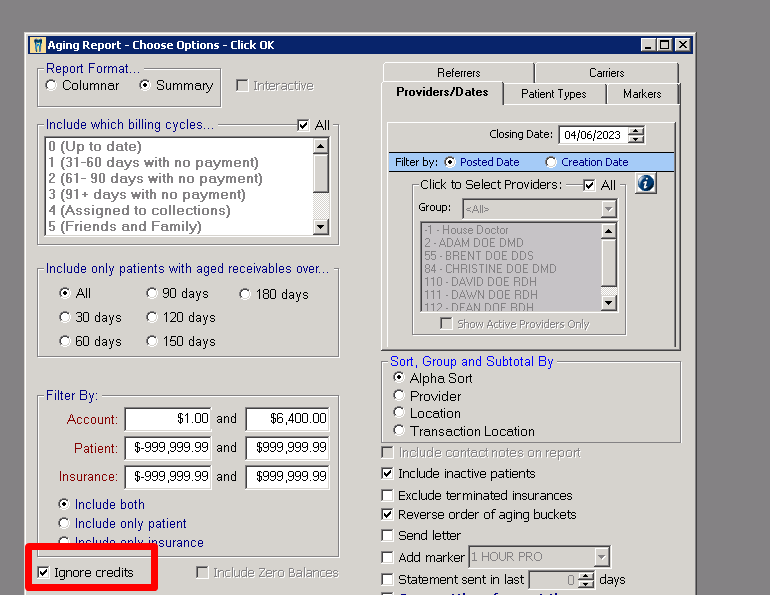
To show Credits Only
For Credits only, create a Credit Total report, and then create an Exclude Credit Total report. Use the following formula to get your Credit Only total.
- Included Credits Total – Excluded Credits Total = Credits Only
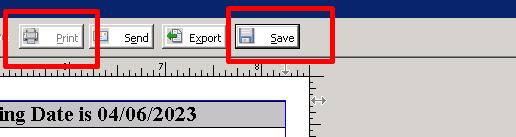
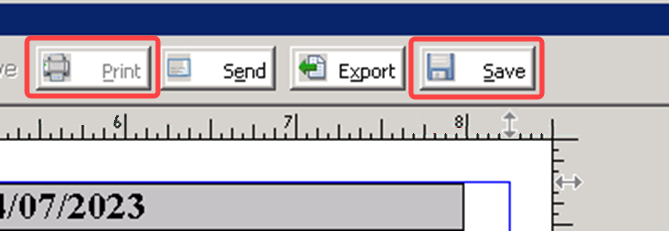
- Print the report or Save it as the desired name.
How to read the Aging report:
The Aging report shows the aging information for the whole office. To see this information, go to the Aging module > Responsible Party. Use the graph below to identify the matching data sets between Dental Vision and Jarvis.
| Jarvis | OMSVision |
Current | 0-30 guarantor column |
Over 30 | 31-60 guarantor column |
Over 60 | 61-90 guarantor column |
Over 90 | 91-120 guarantor column |
Over 120 | 121-150 guarantor column |
Over 150 | 151-180 guarantor column |
Over 180 | 181-365 guarantor column |
Balance | Total column in the report |

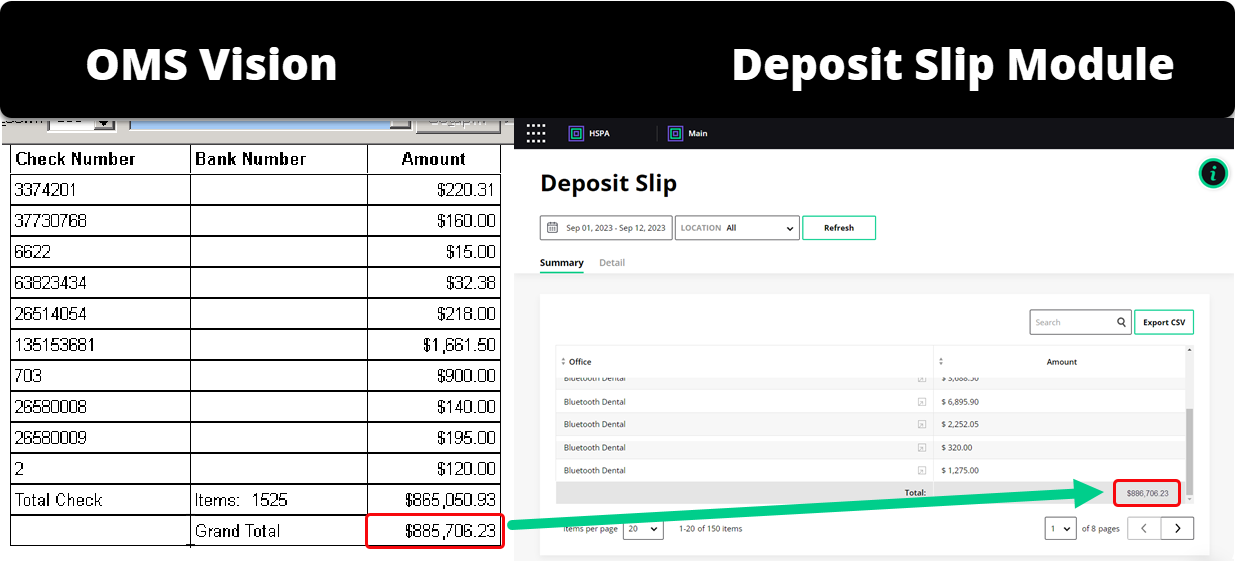
Deposit Slip
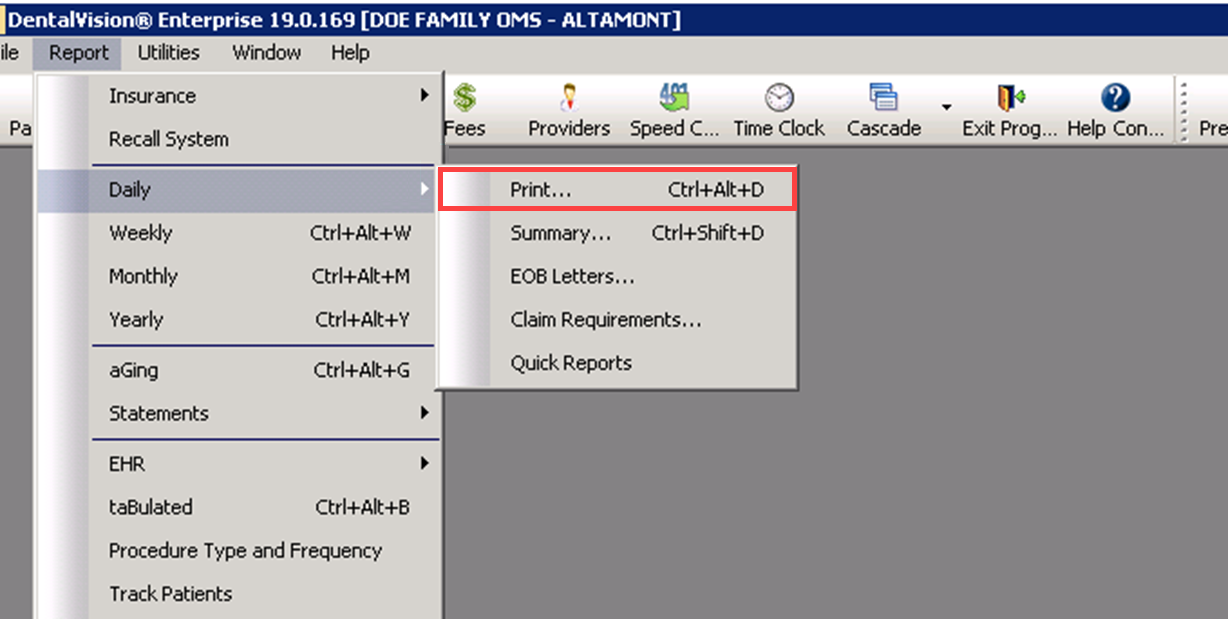
To locate your deposit slip, you will need to create the Daysheet Report in Dental Vision and compare it to the Deposit Slip module in Jarvis Enterprise.
- While in Dental Vision go to Report > Daily > Print or Ctrl + Alt +D
- Once the Daysheet opens, adjust the following features and click OK.
- Check the Daily Summary checkbox
- Check the Deposit Slip checkbox
- Adjust the date to your desired timeframe.
- Ensure the Filter By bullet is checked with the Report types you are using for your instance of Jarvis. (Posted Date, or Creation Date)
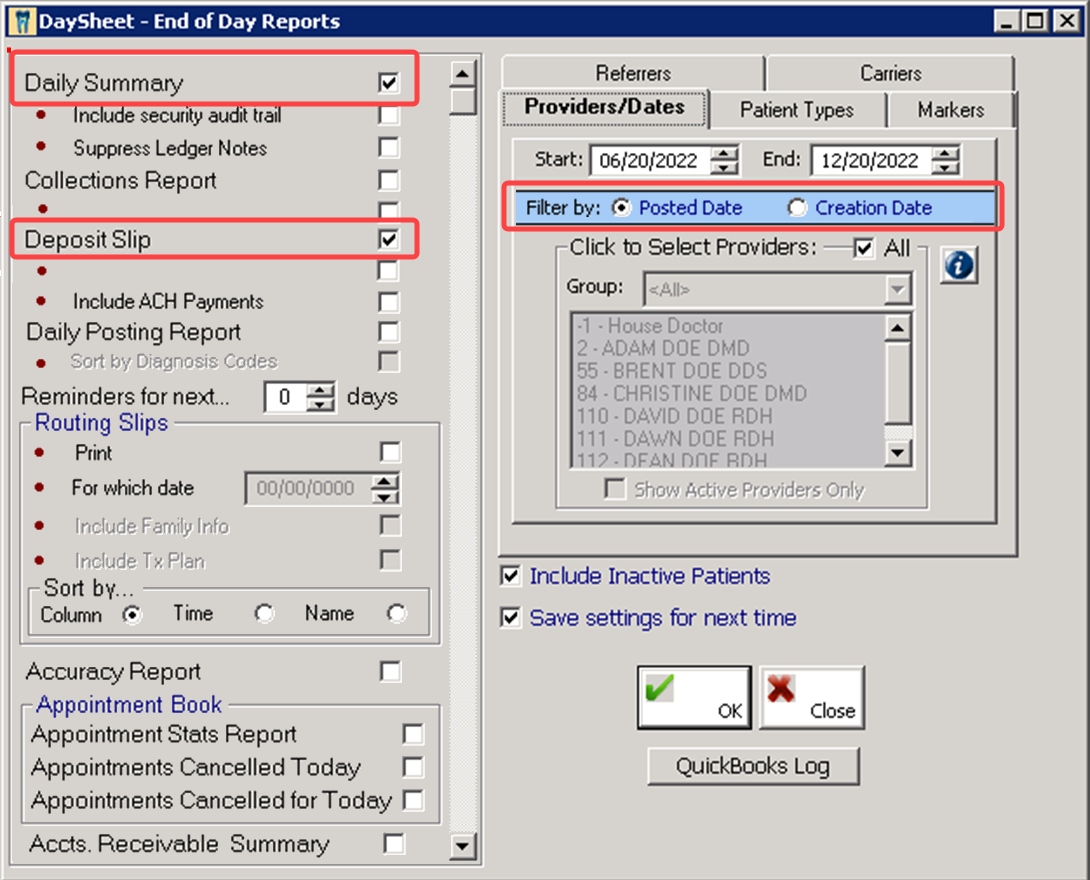
- Print the report or Save it as desired.

How to read Deposit Slip Report:
The “Grand Total” deposit is the total value shown in Jarvis on the Deposit Slip module in Jarvis Enterprise.
Adjustments, Collections, and Production
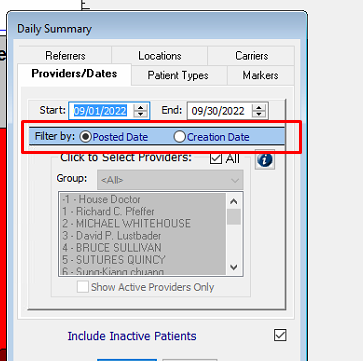
- Go to Reports-> Daily -> Summary.
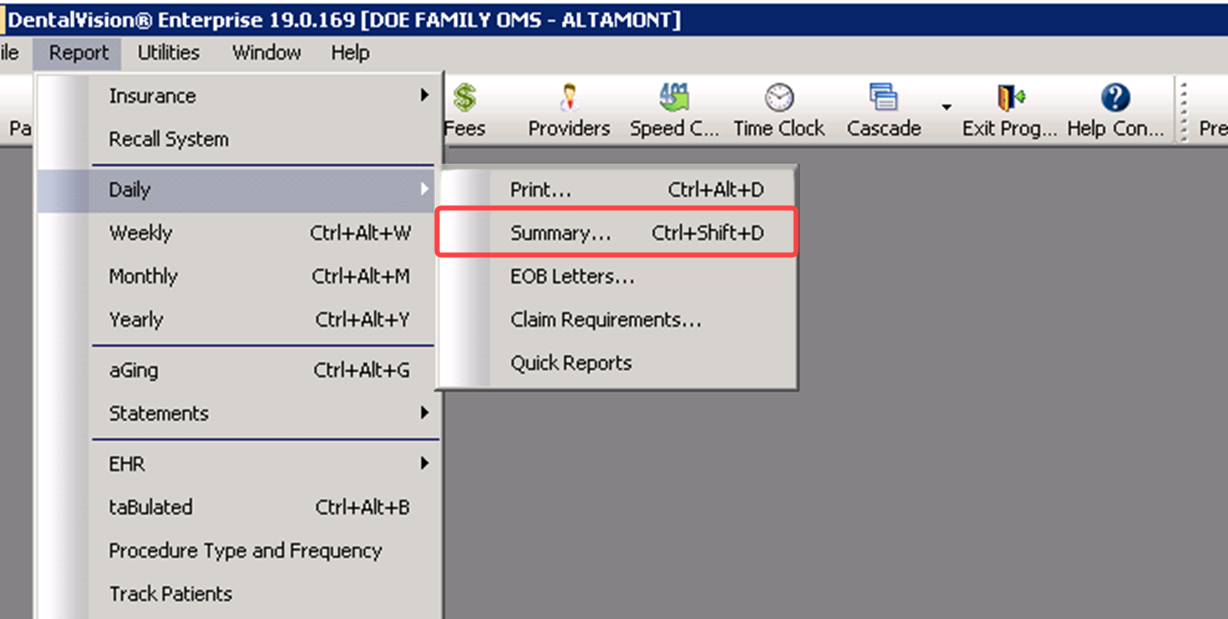
- Once the Daily Summary is open, adjust the following features and click OK:
- Update the Start and End dates to the correct date range.
- Select the Posted Date, or Creation Date as needed.
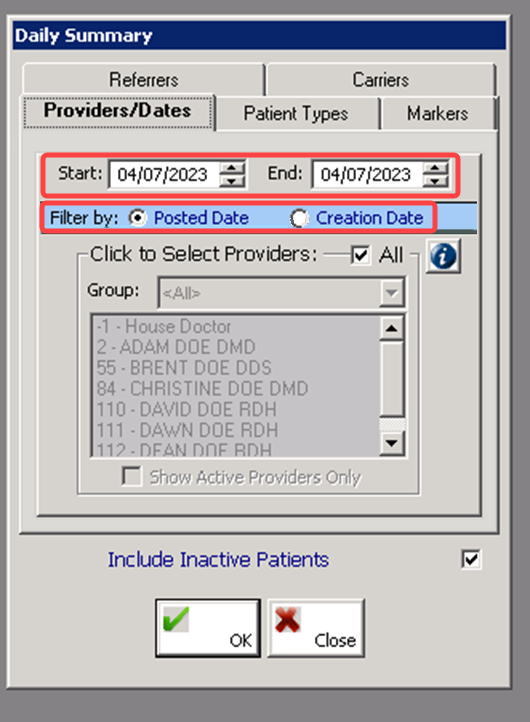
- Print the report or Save it as desired.
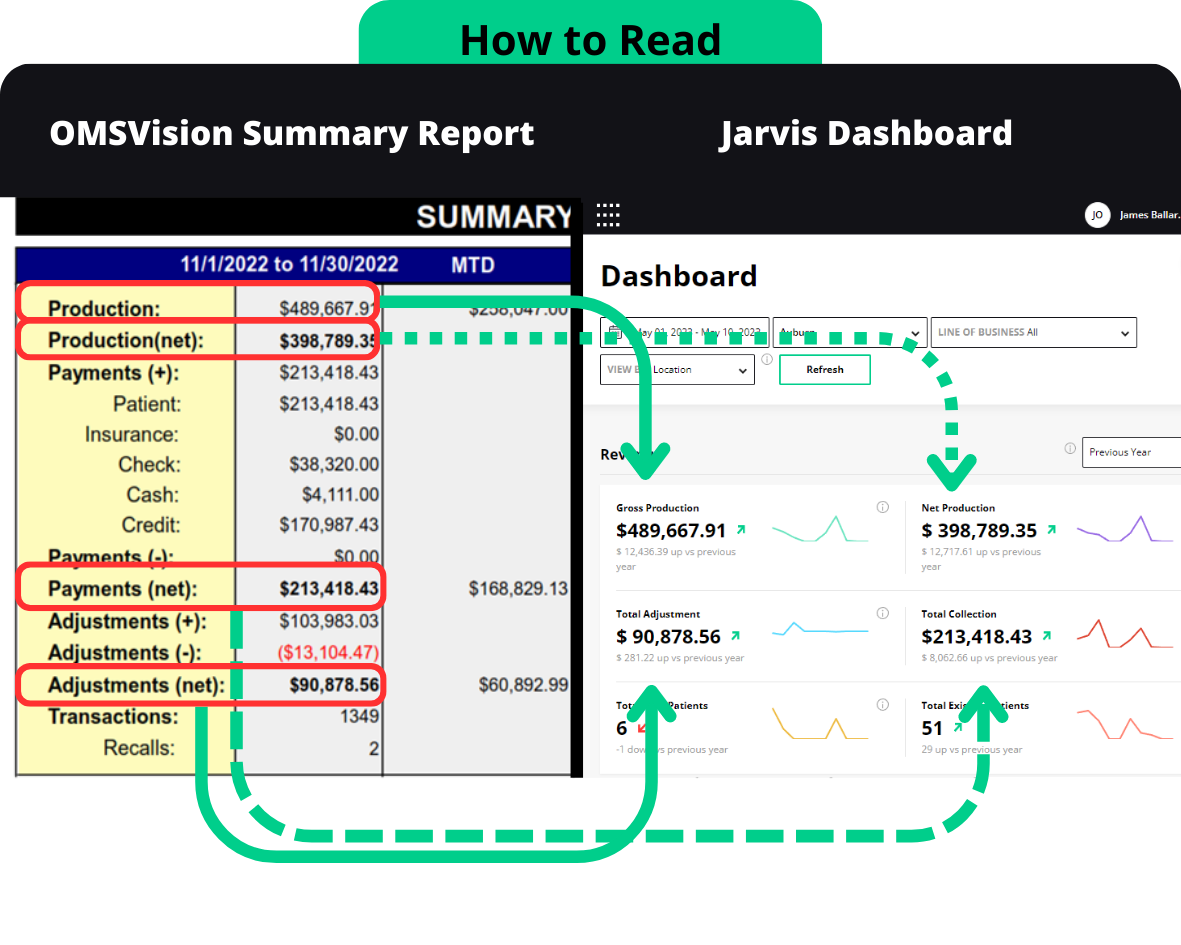
How to locate Office Production, Collections, and Adjustments.
- In Jarvis go to the Dashboard module > Financial Data tiles. On the printed report or the report preview in Dental Vision, go to the page titled “Summary”, and use the following table to find matching values located in the report and Jarvis Analytics:
| OMSVision Report data -> Total | Jarvis Equivalent |
|---|---|
Production | Total Office Gross production |
Payments (Net) | Total Office Collection |
Adjustment (Net) | Total Office Adjustment |
Production (Net) | Total Office Net production |
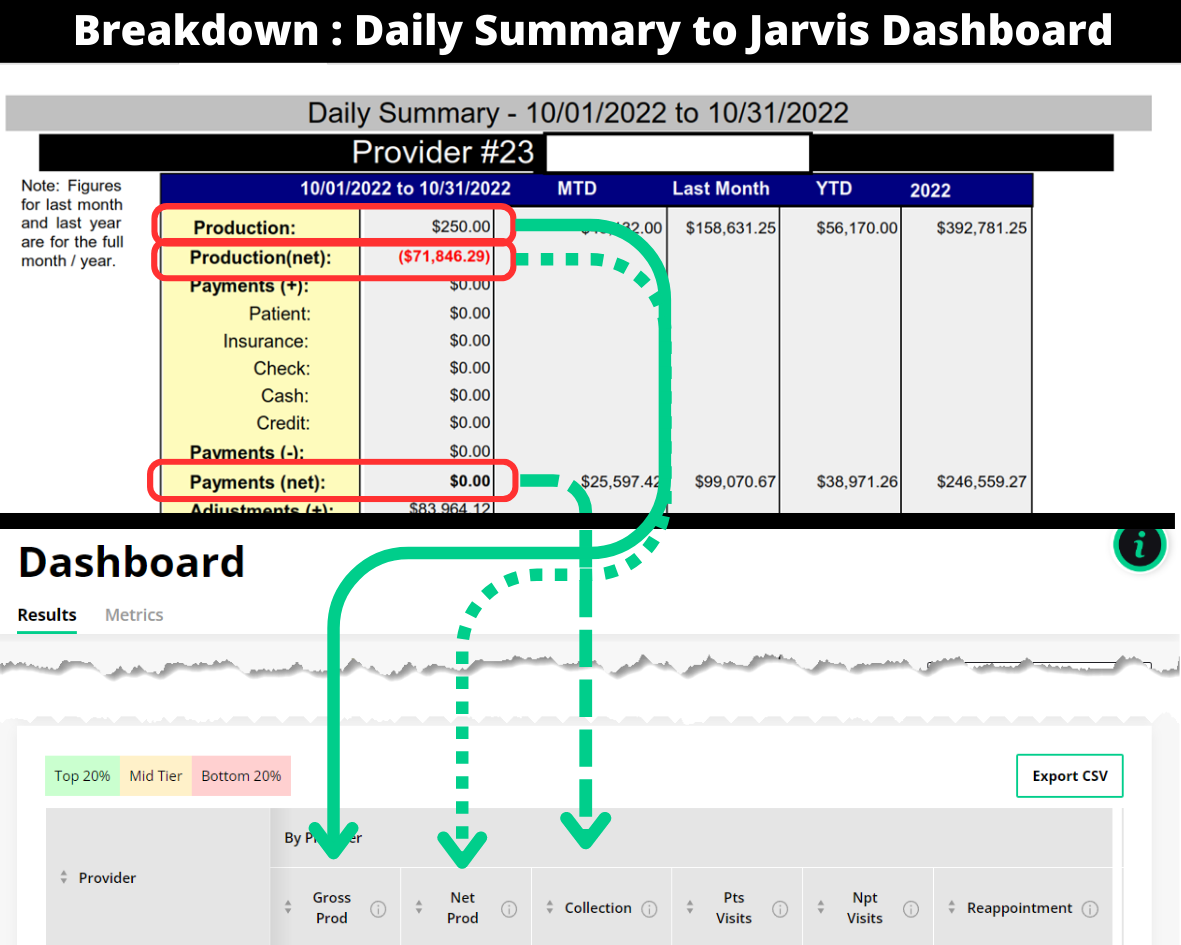
How to locate Provider Production, Collections, and Adjustments.
- In Jarvis go to the Dashboard module and scroll down to the Provider Data table.
- On the printed report or the report preview, go to the page titled “Daily Summary” and has the Provider name. Use the following table to find matching values in the report and Jarvis Analytics: